How do I Start Using the Sensor?
We're here to help you set up your sensor. Thus, here the first steps with your new Motion:
Step #1 - Wake Up the Sensor
When you receive your Equisense sensor, it is in extended standby mode.
- To wake it up, simply plug your sensor into a power outlet using the charger or into your computer using the USB cable. The LED indicator of your sensor will light up.
We advise you to fully charge your sensor before using it, this will take between 2 and 6 hours. When plugging in the sensor to a power outlet the LED will turn orange, showing that it is charging! - When the LED turns green, the sensor is fully charged.

Step #2 - Connect the Sensor to your Account
Now you can connect the sensor to your account. This procedure requires an internet connection.
- Open the Equisense App, go to "settings" and click on "connect".
If it is your first time connecting to a sensor, your smartphone will look for available sensors. - Click on your sensor.
The App will probably ask you to turn on your Bluetooth and location. A popup then appears to let you know everything went well. You're connected. The LED light will turn blue.
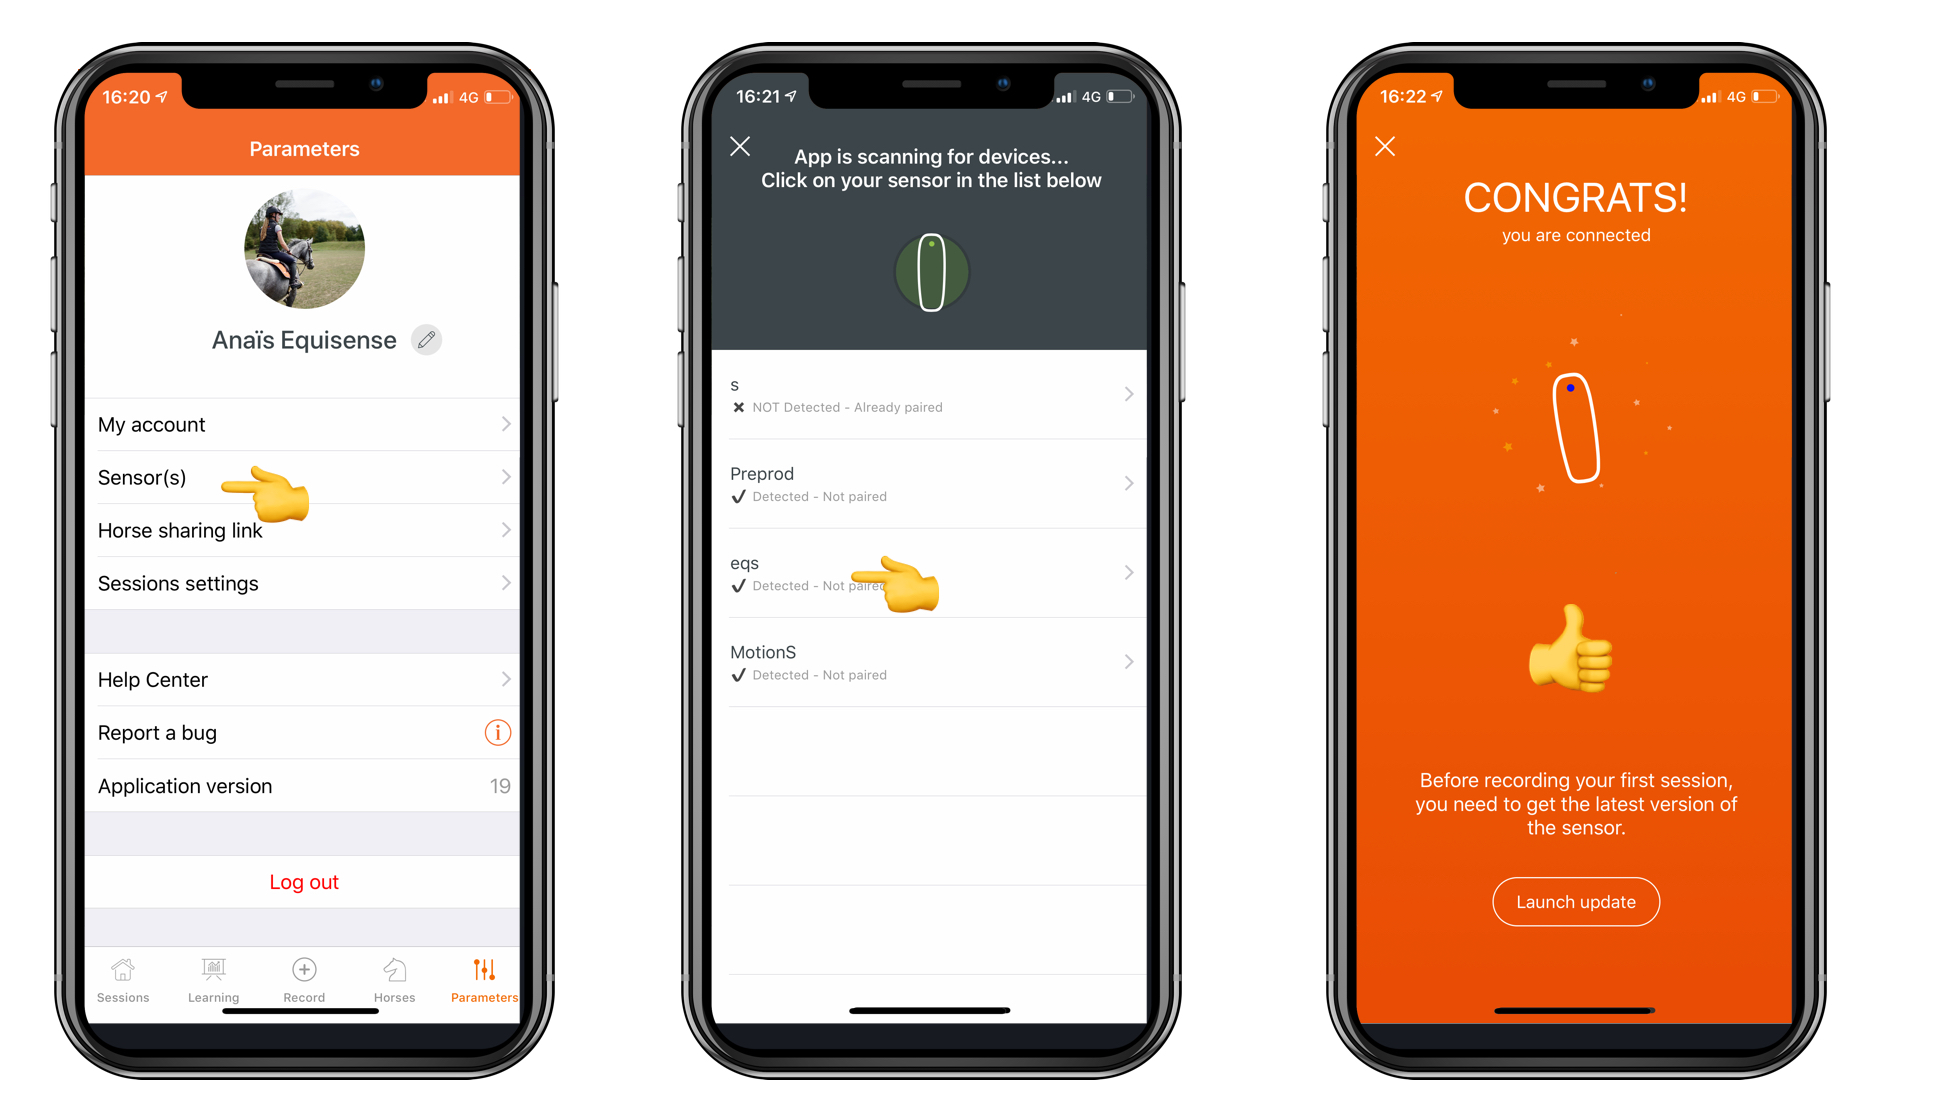
The pop-up invites you to update your sensor, this is the 3rd step.
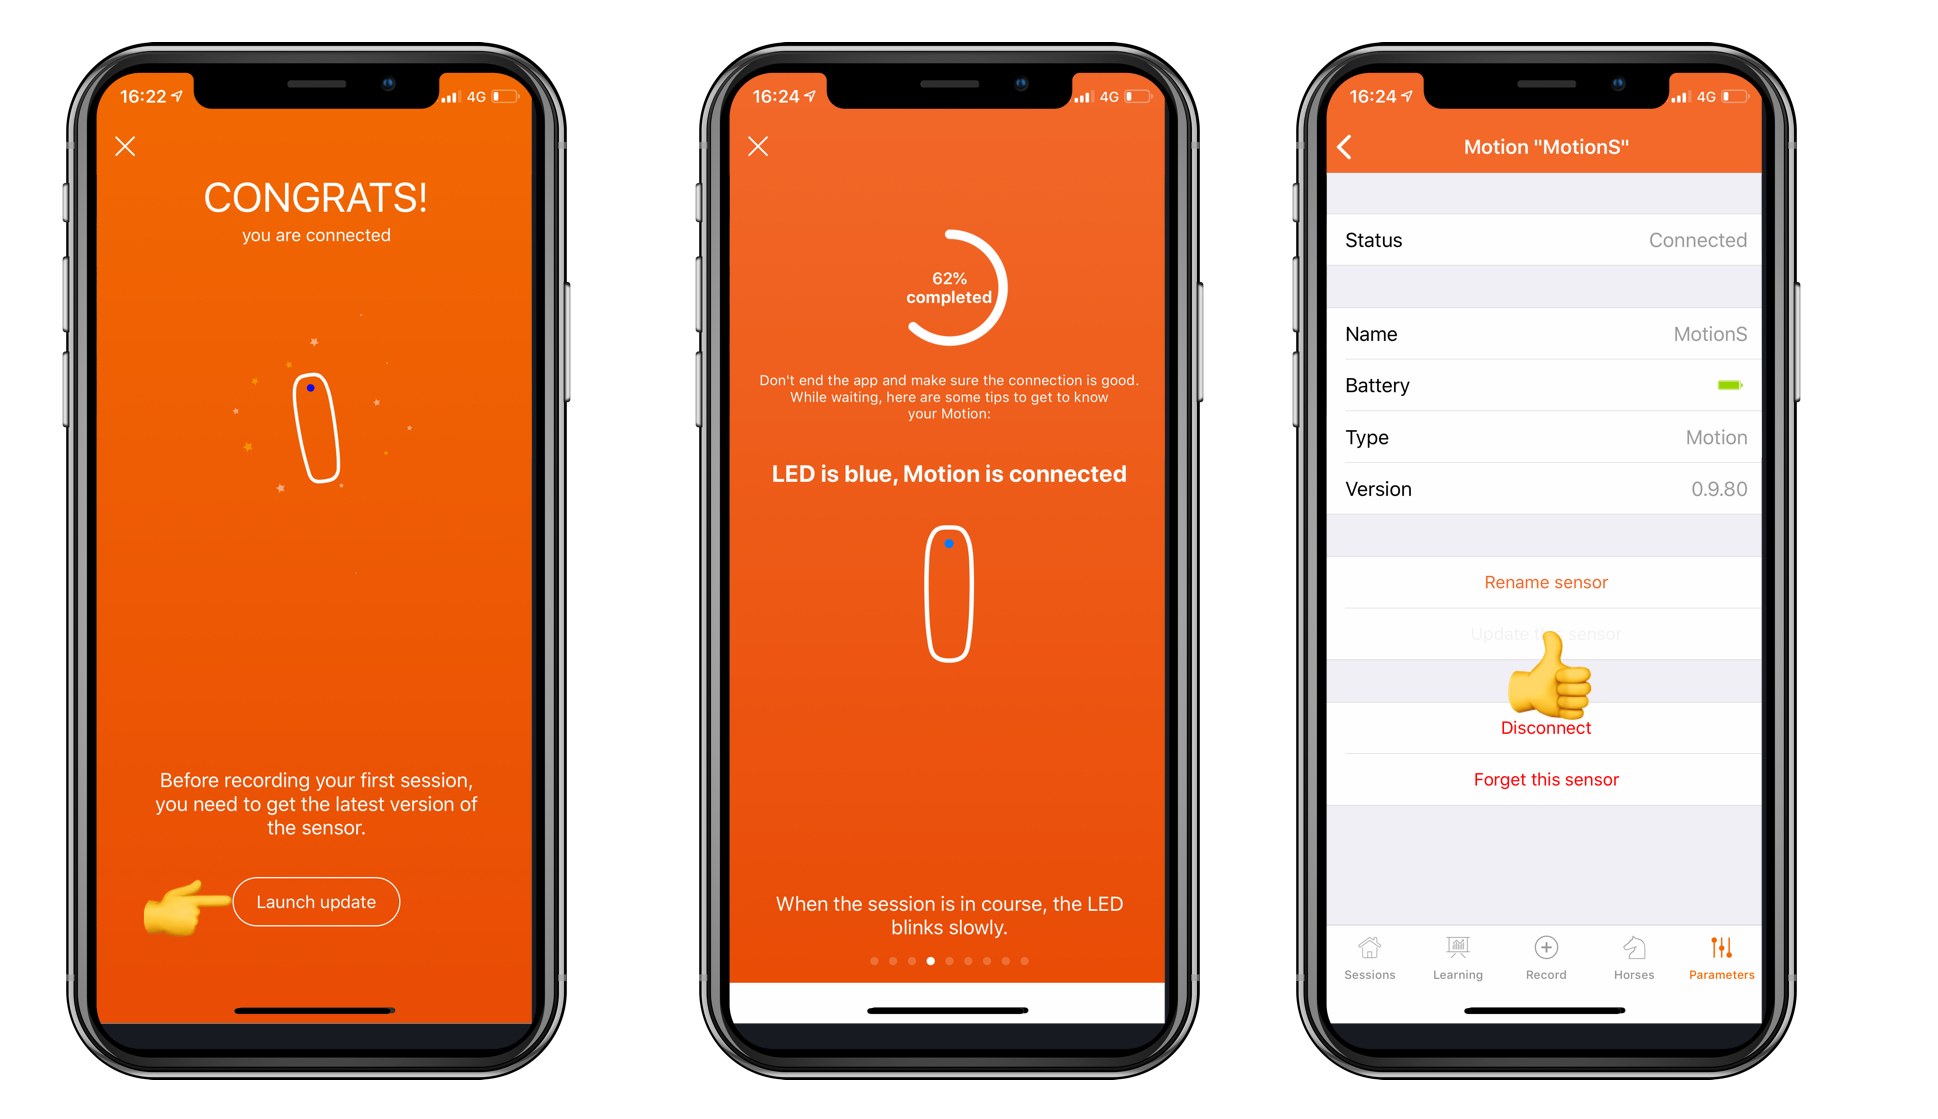
Step #3 - Install the Updates
Before starting to use your Equisense Motion or Motion S Sensor, it is essential to update the system first. A brand new sensor cannot record a session straight away: no data will be calculated.
At this stage, the LED light will be blue, which shows that it is paired with your mobile device.
The sensor update may take several minutes and could and use some battery. Make sure that your sensor and your phone are both fully charged before launching the update.
Update Instructions:
- Make sure that your phone is connected to the internet
- Open the Equisense app and connect your sensor via Bluetooth
- Once your Motion is connected, a pop-up will appear saying an update is available. Press on "Start the Update"
- Your Motion’s LED indicator will turn purple and rapidly blink during the update.
- Keep your Motion and your mobile device close to each other during the update.
- As soon as the update is done, the LED indicator will turn red for a few seconds while restarting and then turn green or blue!
Important to know : For the first sensor update, the app needs to be up to date as well. (If you have just downloaded it, it should be)
Other Ways to do the Update
It is still possible to do the update even if you've closed the popup. Make sure your sensor is connected and then press on the + "record" button" located at the bottom of the screen. Press on 'motion session" and wait for the App to connect to the sensor. When done, the LED turns blue
Now close this screen through the cross located on the high right corner and go back to "settings" and "sensor". From there, click on your sensor and then click on "update".
Step #4 - Use your sensor and enjoy it!
Your sensor is now ready and can be used at all times!
Here some further information:
- How do I fasten the attachment to my girth?
- How do I fasten the attachment to a belly guard girth?
- How do I insert the sensor?
- How do I add or delete a horse?
- How do I start and stop a session?
- How do I delete a session?
If you have any questions, feel free to contact us at contact@equisense.com.